
Ask yourself this question: Do you need to change your drive letter? Yes, and for numerous reasons. For example, even though you now rely more on graphical desktops that enable you to easily click on icons, drive letters are still integral to how your software function.
The bigger question is how to go about changing the drive letters of the drives in your PC. The different ways you can do that will be written out for you below. You'll be using Disk Management, CMD, and PowerShell.

Is It Safe to Change Drive Letters?
Yes, it's very safe to change drive letters. If it wasn't, you wouldn't be reading these letters (pun intended) right now. By default, Windows automatically assigns the letter "C" to your system drive, then other letters to the rest of your storage devices.
But what does it mean to change a device or drive's letter, anyway? Simply put, it's a way to identify your drive by a different letter. But even though changing a drive letter has its benefits, it also harbors risks that can harm your files. How?
For one, changing drive letters confuses Windows. The operating system won't know where to look for your files because it expects to find them in a particular place, but because you've renamed their directory, it will be left unsure what to do.
In a way, it's kind of embarrassing how such advanced technology can sometimes be so dumb, isn't it? Honestly, you just change ONE letter, but your machine doesn't recognize it for what it is!
There is also the risk that any software you install on a drive will cease functioning once you change the letter of that drive. This is not a probability but it's still a possibility, so be wary of doing that. On the bright side, at least the problem is more common with older software. What about the reasons you should change your drive letter?
- Convenience
Say you purchase an external drive and wish to change its drive letter, right? And you're doing this because you already have another drive with the same letter as the external. You can easily do all this without having to resort to complex instructions, and that is very convenient. This freedom to customize your storage devices the way you want is also a welcome addition to computer usage.
- Ease of Recognition
Assigning letters in alphabetical order to drives is a simple way to keep them organized. It benefits you because it will be easier to know what files or programs are installed on which drive. You don't have to waste precious time by going through random locations to find your files.
How to Change Drive Letter in Windows 10?
The first thing you need to know here is this: You cannot change the drive letter of the drive where your Windows is installed on. The only way for you to do that is to do a clean install of the Windows itself; but why go through all that trouble just to change a simple letter?
With that being said, and except for your operating system's default drive, you have much leeway when it comes to changing drive letters.
Even though Windows automatically assigns a drive letter to any external storage device you connect to it, there are unique occasions where it tries to give an already-assigned letter to a new drive. It thus nullifies the action and prevents the drive from showing up in "File Explorer." That's just one credible reason you might see a need to change a drive letter; the rest is up to you, but more important is for you to know how to do it. Kicking off the tutorial will be "Disk Management."
1 Change a Drive Letter in Disk Management
1. Press on the "Windows" + "R" key. When the "Run" window pops up, type this command in its search field: diskmgmt.msc.
2. Hit the "Enter" key and "Disk Management" will be launched.
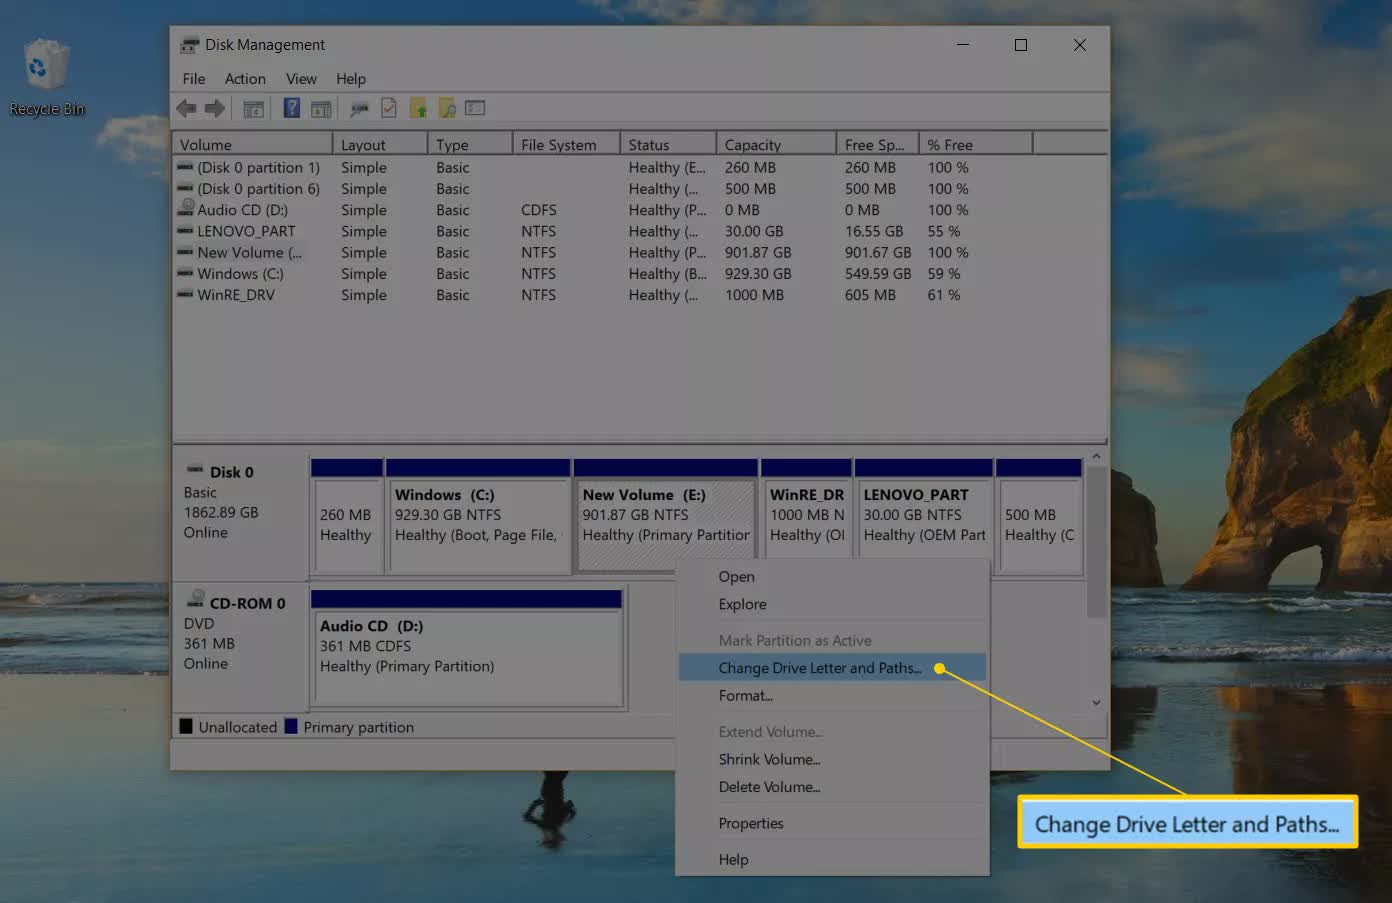
3. You will see a list of drives in the "Disk Management" window. Pick out the one you want to change the letter of, then right-click on it and select "Change Drive Letter and Paths."
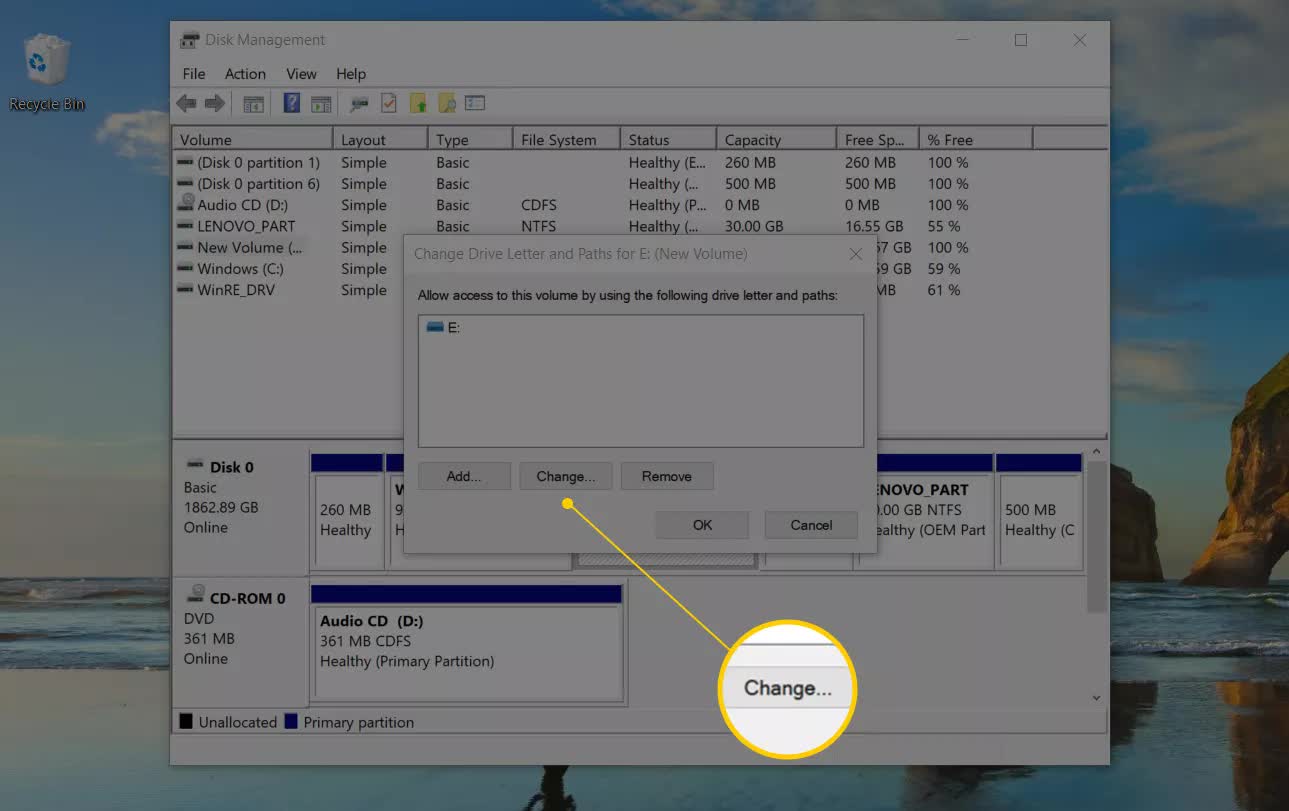
4. Click on "Change" and another window will open up.
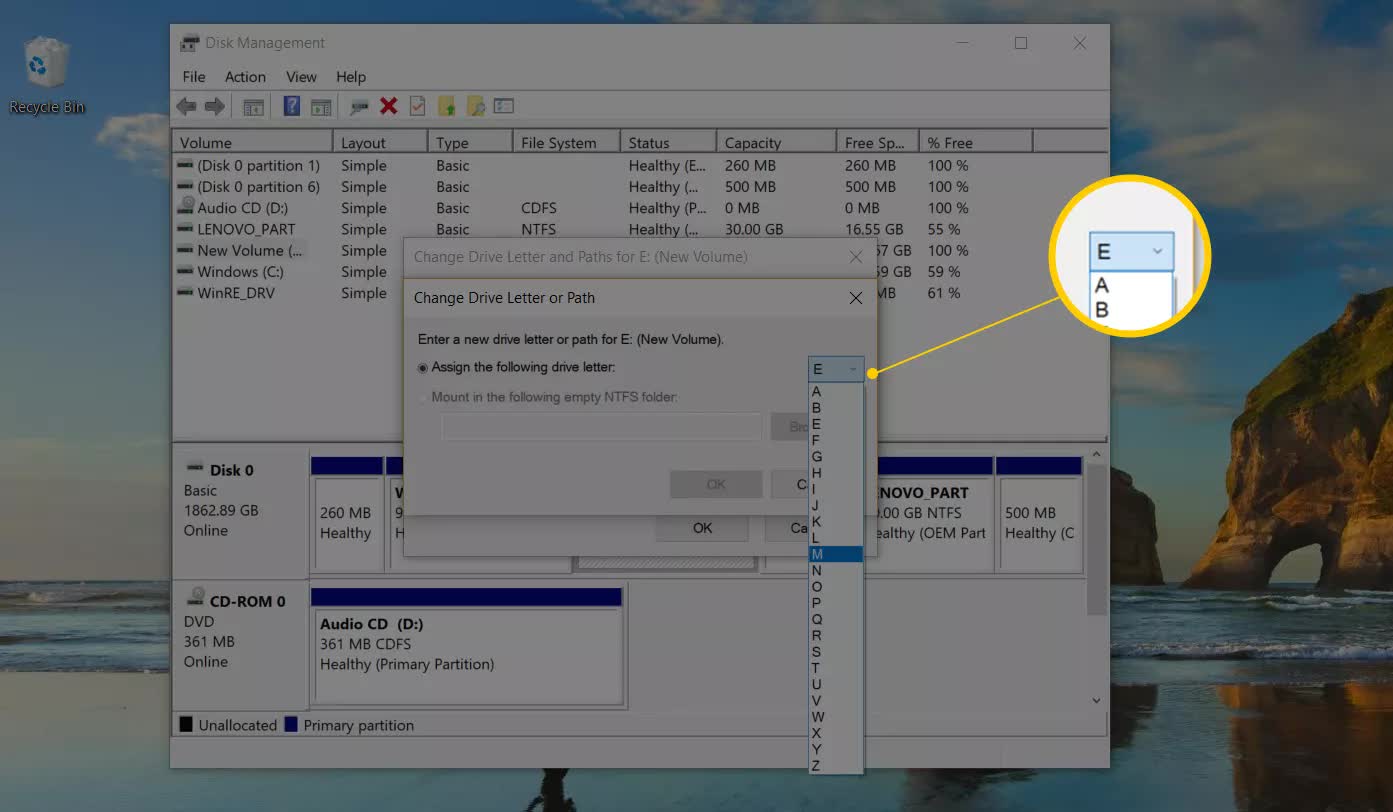
5. Right beside the "Assign the following drive letter" option, you will see a drop-down menu. Select the drive letter you want Windows to give the storage device from this menu.
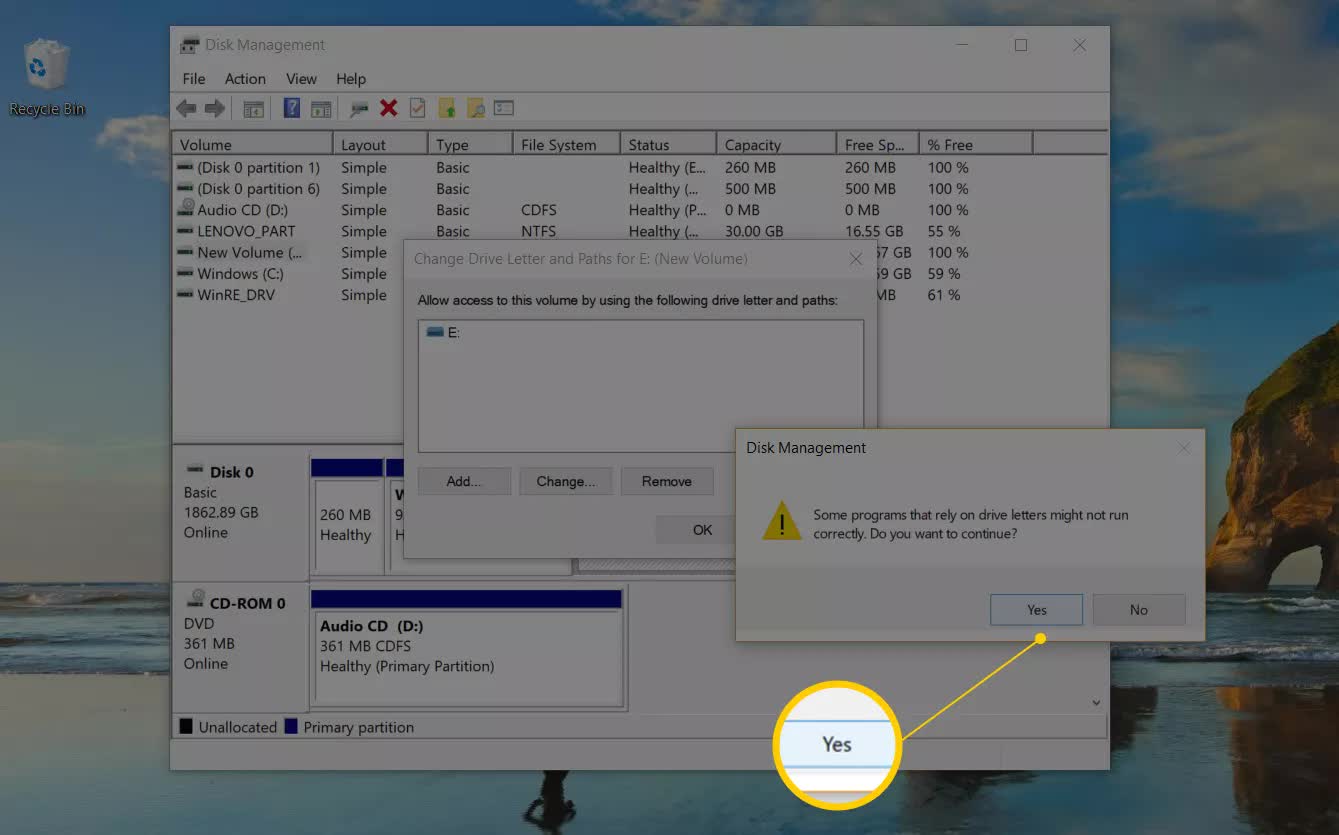
6. Click on "OK" and select "Yes". Close "Disk Management" and your drive will now be bearing a brand-new letter.
2 Change Drive Letter in CMD
1. Press "Windows" + "S", then type in "cmd" in the search field you see. Click on "command prompt". After the command prompt opens up, right-click on it, and select "Run as administrator."
2. Type diskpart in the command window and hit "Enter", then type list volume and press "Enter" again. You will see a list of simple volumes under "Volume ###."
3. One of them will be the drive you want to assign a new letter. Knowing which of them is the drive shouldn't be too hard. Just look at each of their corresponding sizes under the "Size" category.
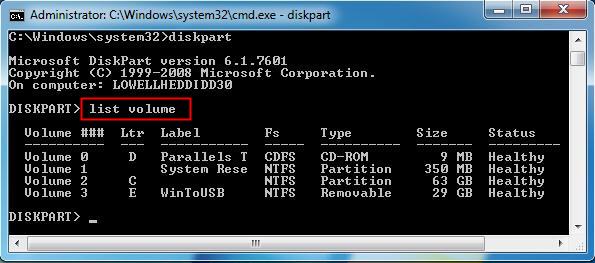
4. Choose the volume and hit "Enter", then type assign letter=R and hit "Enter" one more time.

5. If you want to remove the letter and perhaps replace it with another one, type removes letter=R. And that's it. Close the "command prompt" tool and restart your PC and you should see your drive rocking the new letter you just assigned to it.
3 Change Drive Letter in PowerShell
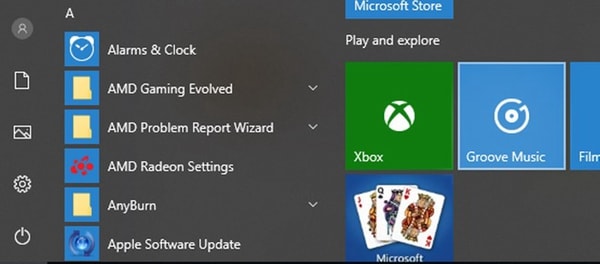
1. Press the "Windows" key and type "Windows PowerShell" in the search bar. Right-click on the program in the search results and choose "Run as administrator."
2. Type Get-Disk in Windows PowerShell to identify the particular hard drive you want to assign the new drive letter to. Press "Enter."
3. Once you select the drive, type the following command and hit "Enter" to assign the drive letter to the drive: Get-Partition -DiskNumber 1 | Set-Partition -NewDriveLetter G
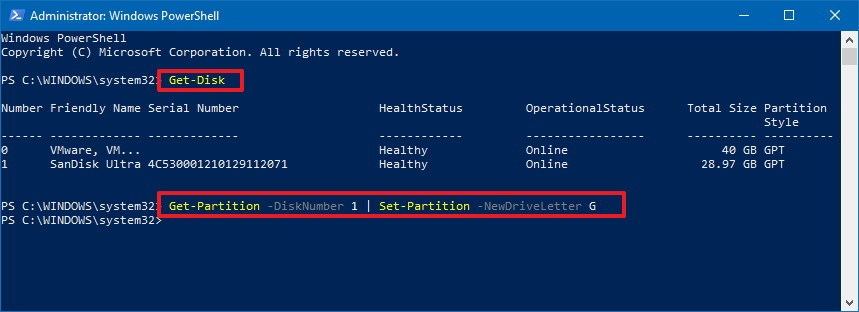
Take note of this: In the command up there, replace "1" with the disk number of the drive to be formatted; the letter "G" in the same command represents the drive letter to be assigned to the drive, so you can change it to the letter you prefer.
Are you looking to change your drive letter in Windows 10? You are in the right place. This task can help a lot to better organize your devices and to better remember what content is stored on each of them. The procedure is very simple and you can do it in two ways. In this post you will know how to do it and you will also be advised to avoid changing the letter of your C Drive.
4 To Change Drive Letter in Registry Editor
The first way to change your drive letter is using CMD tool. You can perform this task in just some minutes through the following steps:
Step 1: Open CMD
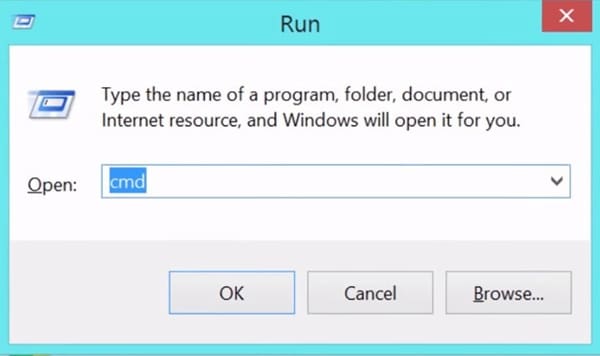
Hold Windows key and press “R” to open Run tool. Now type “cmd” and press “Enter.” Command Prompt will run immediately.
Step 2: Write the commands
Once you opened Command Prompt, type the following commands. Please don’t forget to press “Enter” after each one.
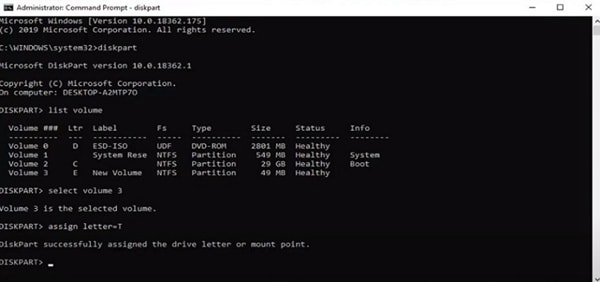
- diskpart
- list volume
- select volume 1* (change "1" for the number of the volume that contains the partition where you want to change the letter)
- assign letter=X (“X” is an example, you can write the letter you want but it has to be different from the rest of the letters of the other partitions)
5 To Change Drive Letter in Settings
Another way to change your drive letter is through Windows settings. This task is a little bit slower than the last one but if you don’t like to use CMD, this will fit better to you. To change your drive letter through Windows settings, please do the following:
Step 1: Open Windows settings
Press Windows key and click the gear icon to open Windows settings.
Step 2: Open “System” page
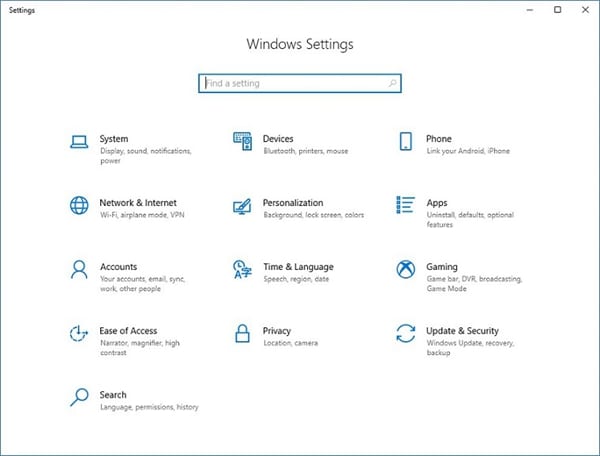
On Windows Settings, click “System.”
Step 3: Open “Manage Disks and Volumes”
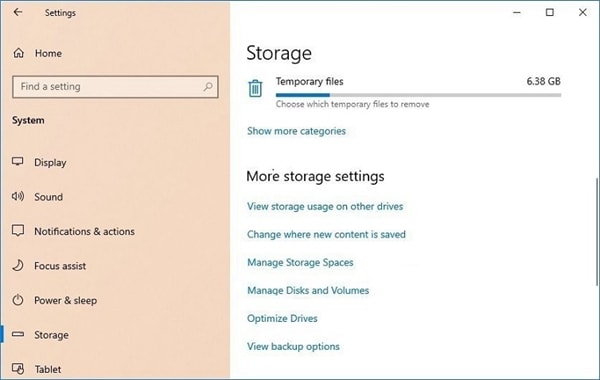
Once you are on “System” page, click “Storage” and then click “Manage Disks and Volumes.” This will open the page where you will change the drive letter.
Step 4: Open drive “Properties”
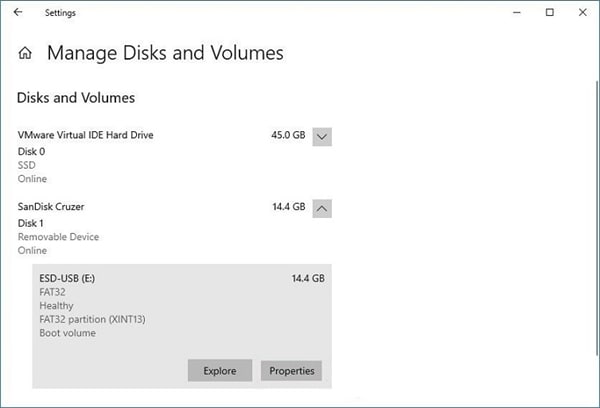
Go to the drive you want to change letter and click “Properties.”
Step 5: Click “Change drive letter”
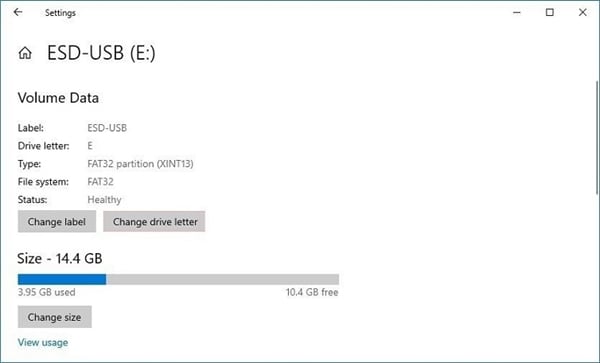
Within Volume Data section, click “Change drive letter.”
Step 6: Type new drive letter
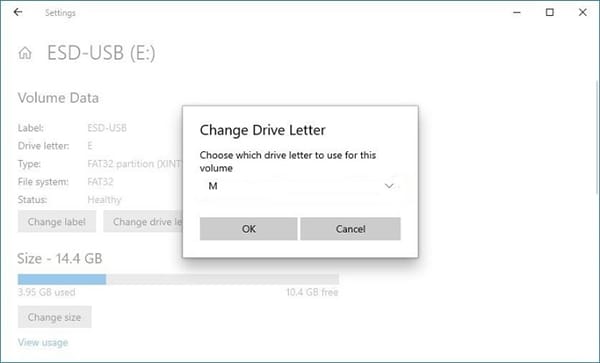
On this window, click the arrow next to the letter and you can select a new one. Finally, click “OK” and the drive letter will be changed.
6 No Changes for the Operating System Drive
If you want to change the letter of the Operating System Drive (C Drive), you will generate problems in your operating system. If you do, Windows will not start because the corresponding files are encrypted and cannot be changed.
In fact, if you try to do this process through Disk Management you will get the message "Some programs that rely on drive letters might not run properly," so it is not recommended that you continue. Even if you don't have important information or you have just installed Windows, I do not advise you to do so and you will avoid to get multiple problems.
Video tutorial: How to Change Drive Letter in Windows 10?
Overview of Windows Drive, Partition & Volume
What's up with these 3 things? Is knowing them significant or something? Yeah, it's a good idea to at least have some basic knowledge of what they are and what they're capable of doing. Besides, you'll understand some of the infinite technical mumbo-jumbo associated with anything computer-related.
Windows Drive
This refers to the hard disk drive that comes preinstalled with Windows on your PC. Your PC might also come with more than a single drive, as is the case with more modern and powerful computers that utilize an SSD as the main drive and HDD as a secondary drive, but Windows is always installed on the main drive; always represented by the letter "C." It's where the OS and software titles are stored in your PC.
Having said that, and to reiterate, don't attempt to change the drive letter of your Windows' primary drive. You can change the drive letters of any other drive, both internal and external, but not the main drive because doing that will only lead to more complications and put a dent in the performance of your Windows. All in all, disregard the instructions on changing drive letters in this instance because they are unnecessary.
Windows Partition
Think of a partition as a division of your hard disk drive. To be more precise, a partition is a logical separation of one drive, but it seems as if this separation creates many physical drives. When it comes to terms, "partition" and "disk partition" are often interchanged. If the word "drive" is added into the mix, it's usually meant to signify a partition with a drive letter attached to it.
You can divide your hard disk into numerous partitions and give each of them a unique letter. There are over 26 letters in the English alphabet, so you obviously can't run out of letters to assign. Now, changing the letter of each partition pretty much follows the same rules as changing a drive letter. These letters make it easier for you to differentiate the partitions and assign individual purposes for them, or it just makes it more convenient for you to know what's in each partition.
Windows Volume
Yeah, this is a big one. Just like your main drive, your system's volume is crucial to the system's performance; heck, your PC won't even start if your volume is faulty. Volume refers to the disk volume that contains hardware-specific files that are necessary for your Windows to boot, namely Ntdetect.com, Ntldr, and Boot.ini.
Just like with Windows drive, don't tamper with the letters for Windows volume. Yes, if you follow the steps given earlier, you can change the letters; but why do that when it's only a recipe for trouble.? You're not advised to venture into your Windows volume. Leave it as it is unless you're sure you know what you're doing.
Closing Words
There, with everything written up there, you should have no trouble changing the drive letter of any drive in your Windows 10. The methods outlined work for both internal and external hard drives as well as more portable storage devices.
Follow the instructions and you're all set. Just don't go and tamper with more than you've been instructed on; don't be in over your head and kill your innocent drive. Third-party tools might try to entice you into using them to get the job done with the quick press of a button, but don't fall for it. The solutions given here are all you need.
FAQs
How do I boot from D drive instead of C?
If your D: volume has an installation of Windows or another operating system, you can change the boot drive through native Windows tools. Press Win + R and type "msconfig". Now click on the "Boot" tab, select the drive you want to boot from and click the "Set as default" button. Before leaving, do not forget to click “apply”.
How do I permanently change boot drive?
You will need to open the BIOS setup utility by pressing F1, F2, F10, F11, or F12 before the Windows logo appears. Go to "Advanced settings" and then to "Boot menu." Look for the D Drive and select it using the arrow keys until it is shaded, then press the "+" key to move it to the top of the list. Press F10 to save your settings and restart your computer.
What happens if C drive is full?
The C Drive is the main partition of a disk and it is where the operating system is installed along with several important files. Ideally, it should not exceed 90% of its capacity so that it can work with total fluidity. When this partition fills up, it may often slows down, freezes, and crashes your computer.
How do I clear space on my C drive?
There are several practical ways to do it. If you have other partitions or storage devices with enough free space, you can move large files and documents or reinstall applications. There are also many temporary files that are stored on the C Drive that you can delete to save great amount of space.
How do I change the boot menu in Windows 10?
Most computers work with UEFI boot mode in Windows 10. To change the boot menu, you must press F1, F2. F10, F11 o F12 before the Windows logo appears. Press F8 to open “Boot Menu”, now look for the device you want to boot from the beginning, select it typing the arrow keys and then press “+” key until it is at the top of the list. Finally press F10 to save settings and restart your PC.
Khalid Abdullahi
contributor Editor
Generally rated4.5(105participated)